Showing posts with label Crown QT Latex Agent Hard Coat. Show all posts

Friday, December 25, 2020

Master Closet Redo


One of the things that is great about our house is that there are two huge master bedroom closets. I had a really great closet at our old house and I was able to move everything right into this one and have plenty of room. I love all of the wood in the house, but we are really trying to move to using wood as more of an accent rather than the entire focus.

You can see that there is a lot of great storage space, so we thought that this would be a quick weekend job...paint the cabinets, change out the hardware, and paint the walls. As with everything else, it ended up being a little more than that. 
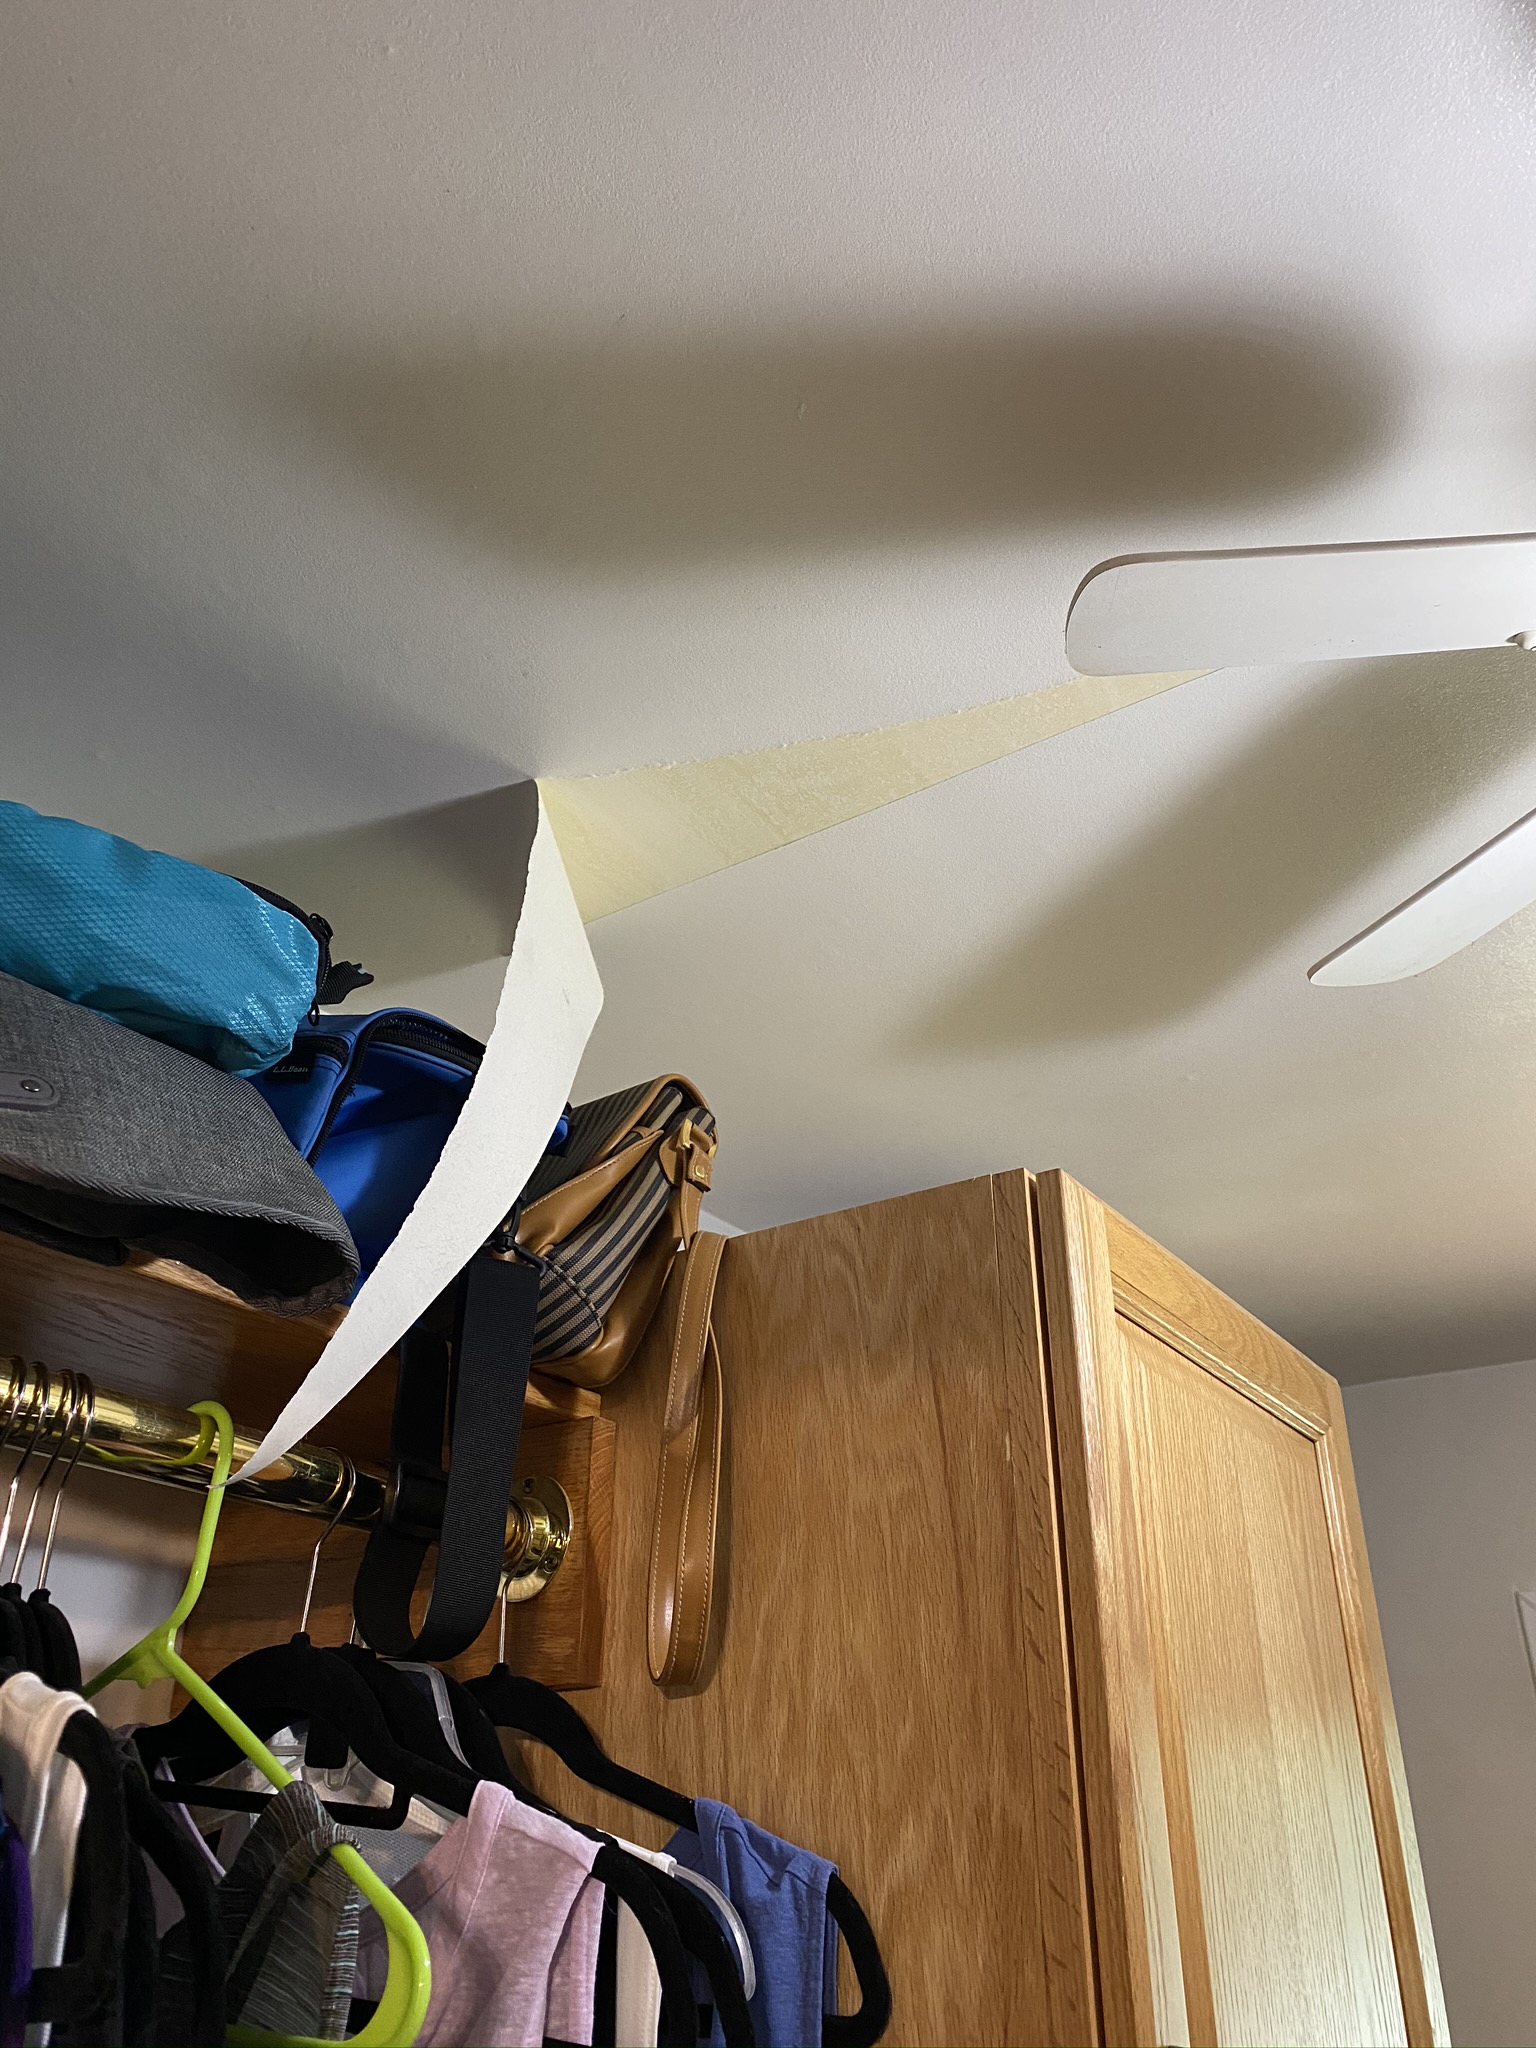
When the hubby went to patch some spots on the ceiling, we learned that it was covered in wallpaper! Just the ceiling, not the walls. We aren't sure why or when this happened, but I just know that it took 6 hours to get it off. It was awful! We used Downy fabric softener mixed with water in a spray bottle, but the putty knife to scrape everything was really the most useful thing. Once it was down, we had a lot of patching to do to repair the ceiling, so our short project ended up being a lot longer. 

Again, we had a good structure, but wanted to paint the wood and take down the heavy brass rods (Does anyone need these? We still have them!). I also didn't have any place to put my shoes, so I wanted to have the hubby build something for them.
You can see that we painted everything and then built the shoe rack on the right side using plywood. 

We painted the doors using the methods that I've previously mentioned (paint additives to make it harder). I also want to mention that 2x4s turned on their sides make great racks to hold cabinets while they are drying.


We used the same flooring in the closet and bathroom as we did in the kitchen. It is waterproof and durable and went well with everything. The chandelier is like the one I had in my old house that I had to leave behind, so my daughters bought me a new one and it is perfect!


We are still working on getting a replacement door, but we went ahead and painted the one that was there and it will work for now. 

I love this area! The hubby installed undercabinet lighting, the wood is a piece of ash that we got from Indy Urban Hardwood. We split that in half and used the other part as a desk top. The mirror was an Etsy purchase from Milltown Merchants.

I've been watching the Home Edit on Netflix, so, of course, I had to add labels to the closet. It really does help a lot though. 

I love my closet...now to work on the other master bedroom closet!


Friday, May 1, 2020

Hutch makeover -- because the kitchen isn't done yet!


Maggie (but we are really looking at the hutch in the back)
I told you that we haven't been able to completely finish any rooms in our house makeover, but we have been working on small bits and pieces. The hutch in the background is one thing that we finished that I just love. I couldn't find any other before pictures of it because it wasn't initially a huge project, but once we got the kitchen cabinets in, I really wanted to get this to match everything else.

We got all new custom kitchen cabinets, but the built-ins in the dining room were KraftMaid custom cabinets with drawer pullouts that were really nice. The only problem is that they were in that darn medium oak.

My daughter doing some work on the back wall.
I've painted cabinets before and they turned out OK, but I wanted to do some research to find a process that worked really well. I was searching and found some valuable information from This Old House. First there was a YouTube video, then I find an article from This Old House that told of two products that were crucial in painting cabinets: Crown QT Latex Agent Hard Coat by Crown and XIM Advanced Technology UMA Bonder and Primer/Sealer. Of course, I can now no longer find the original This Old House article, but at least I remembered what to do with the products.

After cleaning the wood of the hutch and sanding it down, we used two coats of the primer because it seemed rather thin. This is a bonder and primer/sealer, so the article said that it would really help the paint adhere to the cabinet and result in less chipping. That was important to me because when we have painted in the past, we had some minor chipping and I really wanted the hutch to look as nice as the kitchen cabinets.

After the primer, we sanded with a 120 grit sandpaper and made it smooth. Then my husband used his amazing paint sprayer (I love that thing!). We mixed the Hard Coat in with the HGTV Home by Sherwin-Williams semi-gloss paint that we got at Lowe's and sprayed it on the cabinet doors. We used a foam roller to paint the wood on the actual built-in part of the cabinet.

We then purchased our cabinet handles from Amazon. If you haven't purchased cabinet handles from there (or door knobs or really any hardware needed), it is so much cheaper than any place I have found and the quality has been tremendous. We got all of the doorknobs and hinges from my previous post at a fraction of the cost from Amazon -- and I love how nice it looks.

The bonder/primer/sealer and the hardcoat made such a difference. The cabinets feel like we purchased them that way and the finish looks great. I know there are other products that are similar, so I would highly recommend this process of using the bonder, then adding a hardcoat to your paint.

We got a counter top that matches the kitchen and I absolutely love the way the whole project looks. It matches the kitchen (which is blog post that is coming soon!) and really modernized the dining room.
The finished hutch in the dining room